Saturday 16 July 2016

tavern tile 1x1

Hey guys im back after a bit of an absence after i lost my means of taking pictures.I havent been completeley idle however.The first of the 1x1 boards sections is well under way.I carved the street layout into the a sheet of thick white foam board.When this was finished i covered the entire surface with grout to harden it and add some durability.

After the the buildings were glued down.I added sand wood and other debris to the interior of the tavern ruin as well as along the outline of the building where debris would have fallen.After the sand and other debris was dried and place i cut some squares of cardboard which i hardened with glue and placed along the roadway and path areas to simulate paving stones.

The fountain also needed some touching up as holes and irregularities began to appear in the water effects for some reason.This led me to changing the water color  to a muddy brown color again.I added a zombie model in there for scale purposes.


With all the messy stuff out of the way i added some details like the signpost near the fountain and thanks to my cousin over at https://www.facebook.com/spungehammer/?fref=ts i also got some cool tavern related bits in the form of a beer keg and some tankards.You can just about make them out scatttered around the rubble near the bar area of the tavern.

All thats left for this part of the project is the paintjob and some finer details as i plan to add some dead static grass and tufts near the fountain and possibly some dead leaf scatter to really give it an eerie ghost town feel.

Sunday 15 May 2016

Tavern part 3

So i finished the bulk of the painting on this stage of the tavern build.I applied some graveyard earth the wooden cladding on the front drybrushing with some bleached bone before a wash of nuln oil and devlan mud.I settled on a white theme for the main exterior wall and continued the scorching and burning effect around the weathered areas of wood with watered down chaos black followed by a drybrush of codex grey and skull white

For the inside i took a darker approach with the wood as the majority of fire damage would occur on the interior .Starting with scorched brown before working up to graveyard earth. I then continued the fire and smoke damage but this time applied it much heavier to the interior walls. I  also applied it to the rubble scattered around the second floor to help with the smoke damage effect i was going with.I then picked out some od the details like the lantern and shield on the first floor

Im finished with this piece for now apart from adding a tavern sign from the fortified manor kit over the door and possibly some extra details like furniture and decorations once have it set on a permanent base.Thankfully it was quite sturdy after the glue had dried but still needs to be solidly grounded


Thursday 12 May 2016

Tavern part 2

Over the last day or so i got cracking on with the tavern.I got the brickwork on the ground floor painted using the same method i applied to the fountain.I also added some smoke damage around ruined areas of wall using a heavy drybrush of chaos black working up to codex grey and skull white as i got closer to the centre.

After i had the brickwork done i started building the second level.Deciding on a wooden structure i glued some cut up pop sticks together to get the basic shape i was after.I Added some decorative cladding using more pop sticks and a window from the fortified manor kit.I had to scrap the original second story floor base as it was to weak to support the wall.I  replaced it with another base again using pop sticks.

Once the pva dried i added some much needed support to the second level in the form of an adjoining wooden wall section seperating the second story into two rooms.I also added two support pillars on the ground floor to help keep the second story base level.Unfortunately this cant be seen in the picture as i was afraid to move the structure for a rear view shot.The whole process was extremely messy and difficult especially when working with still drying pva glue.It collapsed so many times i came close to rage quitting a few times!.Thankfully i mustered the pacience to be able to see it through.Im hoping too get working on the paint job for the second storey over the coming days as soon as the glue dries and i work up the courage to actually touch it.I also ended up building the second storey much higher than i anticipated somehow as you can see from the picture.The skeleton spearman is dwarfed by the building!

Sunday 8 May 2016

Tavern part 1

I decided to keep busy while i was waiting on the water effects on the fountain to dry.So i pushed on to what will accompany the fountain on the first of my 1x1 tiles.A tavern is a nice themed building i thought would go well within the market area.

Using more sprue bricks i built up the front face of the taverns exterior walls.Leaving plenty of gaps where bricks have blown loose or collapsed. I plan to add additional walls corner and pieces later on to close in the structure.I focused on the ground floor adding some timber frames to the original brick structure and then filled in the interior edges with some rubble and other decorative bits.I also added a lantern and a sign to the front entrance.

After the glue from the main structure dried.I built the frame for the second story floor using more sprue cut offs.With wooden floorboards added i glued it directly onto the ruin.Im going to halt construction at this stage and add paint before moving on to the second floor walls.


Fountain part 4 Finished !


After a ridiculously long wait the water effects for the fountain have finally dried.I lost count of the amount of applications i had to use to fill it to a suitable level.I eventually settled for a simpler murky green colour after my first attempt at the water failed.

For the flag i drew a rough shape on some card that was lying around.I made it double sided and cut out the square in the middle to create tabs as you can see in the picture.It was then just a matter of sticking both sides and wrapping it around the flagpole.I stiffened it with some pva glue.

I wanted to keep any flags or banners id be using throughout the project in line with the setting.I could find no official hearaldry for Mordheim.Since it was once the capital of Ostermark i went with the provinces purple and yellow scheme.Which ironically is the colour of the county flag for where im from !

So thats it on the fountain.I am quite happy with the result since this is my first finished piece.came together nicely for something made out of random bits i found around the house.

Saturday 30 April 2016

Fountain part 3

Heres the fountain with the additional layers of dry brushing added.I applied another layer of fortress grey across the pavement and rubble.Followed by a very light stippling of bleached bone.I also applied fortress grey to the oval patterns on the fountains base to help it stand out.I  gave the areas in between another drybrush but this time with codex grey.I also gave the ornament another layer of boltgun metal followed by a highlight of mithril silver.i then applied a final light wash of nuln oil

I then tried my hand at the water effects.i wanted to go with a stagnant muddy effect to help with the ghost town feel.I concocted a mix of camo green and desert yellow and mixed it with some watered down pva glue.then poured it directly into the fountain bowl.Its still wet in the picture so im not exactly sure how its going to turn out myself as of yet.It appears much brighter in the pictures I took.i also noticed it seemed a bit thicker than i hoped.Not sure if i mixed it incorrectly or if its the result of using extremely cheap glue.Im hoping however when it dries fully it will have the desired transluscent effect.

Thats all for now next il be hoping to start work on the flag for the ornament and adding more water effects as the mixture dries out.Photos seemed to have washed out the colour a bit i included a skeleton warrior for scale


Wednesday 27 April 2016

Fountain part 2


So i picked up my brushes again for the first time in an age and made a start on getting the fountain painted.after a basecoat of astronomicon grey i began to pick out random bricks from the pavement and the fountain pillar using a variety of greys and browns.As cobblestones  and medievil structures are rarely uniform in colour or pattern.I then basecoated the sand with khemri brown to give the impression that the earth was showing between the gaps.I was afraid that by sticking to stoney grey colours that when that it would wash out the whole table on completion.So i needed to work in some alternative colours to stop everything blending together.The main structure of the fountain was given a coat of fortress grey.The ornament was based with leadbelcher  before a drybrush of boltgun metal and a sepia wash.

I followed up with some dry brushing over the earth with graveyard earth and stippled some fortress grey to simulate some loose rubble on the top.I took some ripped up sponge and stippled the fountain with camo green to give the stone a mossy impression around the base.I followed this with another drybrush of codex grey to tie it all together as i didnt want the green to be too prominent.The whole piece was then given a heavy wash of devlan mud.

Im about half way through the painting process all thats left is to add some final layers of dry brushing and some highlights.Il be moving on then to the water effects and adding some additional details to the base.As well as coming up with something to add to the flag pole


Sunday 24 April 2016

Fountain part 1

Im back again this time with a different piece.Iv decided to put the market stalls on hold as i want to see how my test piece looks with a lick of paint.Just to make sure im 100 per cent happy before continuing on.

In the meantime i decided to start working on the centerpiece for the market area.as i needed a rough idea of how much space id have to play around with.Since Mordheim is played on a smaller 4x4 surface.Il be building seperate 1x1 tiles that i can swap in and out to keep the gaming surface varied.I wanted to make sure the entirety of the market fit within the designated 1x1 square.

So for the base of the fountain i used some basic items i found lying around the house.the main body was built from a lid from and old coffee jar which i weathered with knife to add some damage.i then took a smaller lid this time from a soft drink bottle and glued it down within the centre of the first lid

I wasnt entirely happy with the height of the central platform.So i decided to build a pillar from bricks i made with some cut up sprue to add some extra height.As it started to take shape i began to pack the bricks more loosely along the outside to make it look as if the pillar was slowly collapsing on itself.Before adding the griffon with the flag post from the fortified manor kit as the ornament.I finished with some sand and sprue rubble to the floor of the fountain and the edges of the collapsing pillar.

I then glued the main structure to a blank cd as a base.Using more sprue bricks as cobblestone paving.I deliberately left some gaps at this stage so i could add some sand and rubble to fill in areas where the paving has been damaged and worn away.

Iv included some shots i took along the way to show how it all came together.This is all from this piece for now.Il likely be adding some more debris and other details from my bits box to the base before.i touch up the sand on move on to the paint work and water effects for inside the fountain


Monday 18 April 2016

Market Stalls part 1

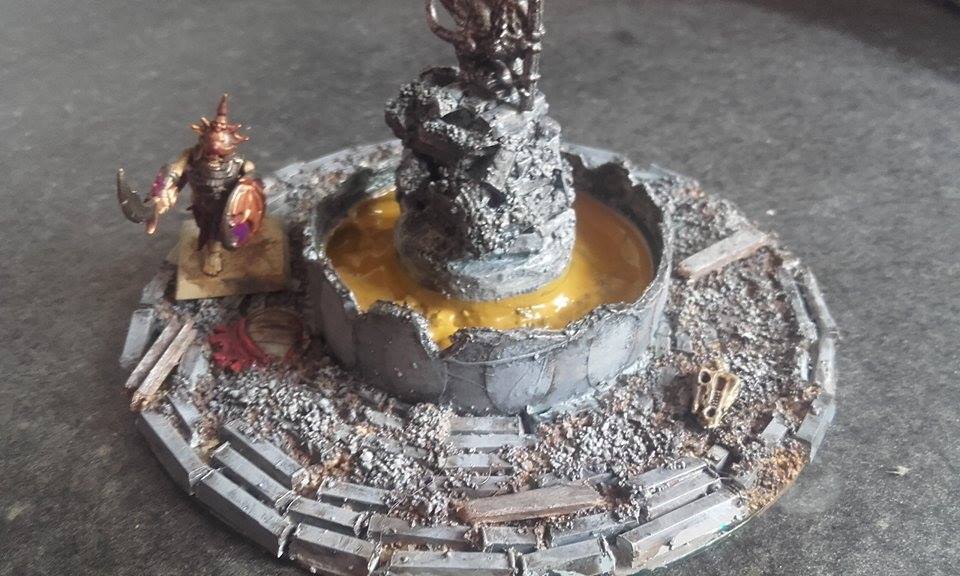
So when i tried to visualise the design for the cursed city.I knew i wanted an open market square with some merchant tents and stalls and maybe a fountain for my warband to fight through.As a market area is prett much a staple for any medievil or fantasy city

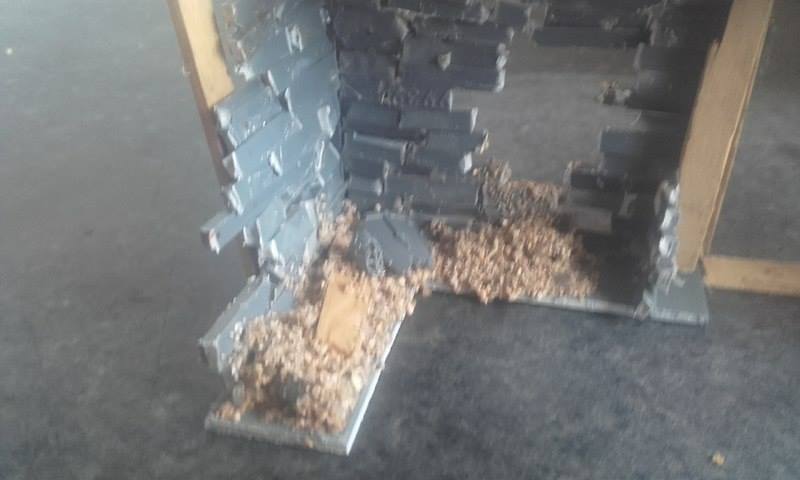
I decided this was probably the best place  to start with the limited supplies and budget i have for this project.I started work today on the first of stalls.i had the idea of using cut up lengths of sprue  to create scenery so after a quick google search i seen i was not the only one and it can be done quiet effectively. Its also a great way to get rid of all those empty sprue frames.

I cut up some spew to the required lengths using a model to get a rough size for each support beam for the stall.I then glued them together in the rough shape i wanted and added some lolilpop sticks to the frame to make the finsihed the structure.as Mordheim had been levelled by a comet i deliberately made it rickety and weathred so i cut and scored the supports and lollipop planks with a knife to give them a delipitated look.

I love open world role playing games like the eldar scroll series.especially the attention to details that really absorb you into the world.This inspired me to to the same with my terrain.so after a quick root through my bits box .I  rooted out a rusted breastplate and some shields from the vampire counts skeleton box.I added them to the finished structure of the stall to make it seem armour and accesories were sold here before the comet hit.

Apologies for the poor photo quality best i can get at the moment


I was quite pleased with the finished product especially for my first attempt.it was quick and relatively easy so im hoping to pump out a few more variations of stalls over the next few weeks.let me no what you guys think.Thanks for looking